BraveSirRobbin
Moderator
How-To Measure Salt Level in Your Water Softener Using an Ultrasonic Sensor
by BraveSirRobbin
Introduction
This How-To will describe how to measure the salt level for your water softener. This has been requested by a number of members. Various techniques have been tried in the past, but all had one common methodology. "Something" had to touch the salt. Be it a weight, string, magnet, etc... all of these methods required a mechanical means that touched the top level of the salt to acquire a "level" reading.
The problem with these methods was it made refilling the softener difficult. These strings had to be manually coiled/lifted/etc... to get them out of the way, then rearranged so they could start measuring the "new" level.
Methodology
This method uses an "ultrasonic" sensor so nothing touches the salt. Also, with the mounting method used, the sensor can be pivoted out of the way for easy refilling of salt in the water softener.
First, I would like to thank fellow Cocooner roussell for posting about the Maxbotix Ultrasonic Sensor in THIS thread. This sparked an interest for a lot of applications, thus THIS dedicated thread was created.
Also, this How-To was featured as a Home Toys article for their August 2006 issue.
Ultrasonic Sensor Details
HERE is the link for the Maxbotix Ultrasonic Sensor used.
Bench testing was first performed to determine what code/methodology was needed for a serial interface as well as power and overall system accuracy. I had a leftover five volt wall wart and since the unit required 4.5 to 5.5 volts DC for power I thought it would make for a good power source.
After plugging in the wall-wart (to check the voltage output level before connecting it to the sensor), I noticed that the voltage was slightly above 5.5 volts DC (a common problem with most wall warts that I use in my home). I therefore placed a diode in-line with the positive lead in order to get the voltage down to a level within specs.
All the unit needs for an RS-232 interface is for pin 2 of the serial port to be connected to the "TX" solder ring and pin 5 to the "GND" solder ring. The wall wart would of course be connected to "+5v" and "GND".
HyperTerminal was used to check for communication. As soon as the unit was powered up and HyperTerminal set for 9600, N, 8, 1 serial port settings (no hardware control) the unit sent an "R" followed by a three digit ASCII number which represented inches. The update was very fast and it was accurate to within one inch.
I found that as long as the "RX" line was high (or disconnected in this case), the unit would just "free run" (i.e. keep transmitting the data). I also noticed that CPU level was significantly increased when the unit was connected and free-running.
Since I wanted to place this unit in a very warm garage environment and since I didn't want to have it free run I decided the easiest way to have the unit interfaced with my automation computer was to turn power to the unit on via an appliance module for just a second whenever data was needed (only once a day in this case).
I would just turn the appliance module on, wait a second, get the distance data to a HomeSeer device, then turn the unit off.
I would like to thank Michael (the Great) McSharry for helping me out with the serial code (in THIS HomeSeer thread) to interface this device via HomeSeer. Though this code is HomeSeer specific it should be easily modified for other HA systems.
Mounting the Sensor

(Click on Picture for Full Sized Image)
The Water Softener
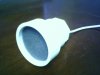
The sensor is very small and is very easy to mount. Care must be taken as to not short out any circuitry on the PC board.
I mounted the unit on a leftover "hinge mount" from an X-10 security motion sensor (I dropped the motion sensor... long story). I used a rubber washer between the mount and the sensor's PC board. I drilled a small hole through the arm of the mount and attached the sensor as shown.

(Click on Picture for Full Sized Image)
Ultrasonic Sensor Mounting
I then attached the mount to the water softener. Make sure you know exactly what you are drilling/screwing into as not to damage the water softener itself!

(Click on Picture for Full Sized Image)
Ultrasonic Sensor Mounting

(Click on Picture for Full Sized Image)
Ultrasonic Sensor Mounting (Overhead View)
I had the luxury of AC Power and Cat5e cable available near the water softener (prior planning before the house was built). I just used a pair of Cat5e wires from that cable (for the RS-232 signal and gnd) and plugged an appliance module and the wall wart in the nearby outlet via a home made short AC extension cord (for the unit's power). This homemade extension cord has a built in small amperage fuse, therefore I didn't place any additional inline fuses in the system.
I then routed the five volt power leads and the Cat5e pair through the water softener's "overfill drain" outlet and soldered the diode and leads to the sonic sensor's PC board.
Making the Connections to the HA Computer
I then wired the HA computer's Com7 port to the appropriate patch socket in my wiring closet via a custom DB-9 to Cat-5e interface cable. As long as you keep track of the color pair (brown/brown-white in my case) that you wired the sensor's TX and GND lines to, this cable will work through multiple patches.
I just wired the brown wire (connected to the TX) to pin #2 of a 9-Pin D Female connector and the brown-white wire (connected to GND) to pin #5 of the D Female connector to one end of a (cut) Cat-5e cable and plugged the other end into the nearby RJ-45 socket. After going through multiple patches I then used a cut piece of a Cat5e jumper and placed the RJ-45 connector end into the outlet near my computer and soldered the brown wire to pin #2 of a 9-Pin D connector, and the brown/white wire to pin #5. I then connected the 9-Pin D connector to Com7 of my Edgeport USB to eight port serial expander which is on my HomeSeer PC.

You can also use a RJ-45 to 9-Pin "D" connector (such as THIS one) for this final connection instead.

(Click on Picture for Full Sized Image)
Final Wiring & Mounting
Testing the System
I again opened HyperTerminal up and looked at Com 7 with the appropriate serial parameters listed above.
I then turned the appliance module on and noticed a reading of R018 on HyperTerminal which of course meant the unit was reading 18 inches.
I took a tape measure and measured from the "tip" of the sensor to the salt level and that reading was over 17 inches. Therefore the unit looked like it was working properly. I took a piece of cardboard and tested other "simulated" salt levels. The unit's readings were always within an inch of the real measurements.
Developing the Code
As mentioned earlier Micheal McSharry helped with the bulk of the serial interface code. Basically when HomeSeer starts, I want to open Com 7 (in my case as I'm using an Edgeport 8 serial to USB interface) in the "StartUp.txt" file and close the Com Port when HomeSeer exits.
Then, whenever a reading is needed, a HomeSeer event will be created and the unit will power on for a second and then power off. During that time a sensor reading will be "stuffed" in a HomeSeer device and a "converted percentage" reading stuffed into another HomeSeer device. This second percentage reading will represent the salt level in "%" (i.e. between 0-100 percent filled).
Code Listing
Here is the HomeSeer (ver 1.7x) code I used to open serial port 7 and is placed in the "startup.txt" entry:
Note that I'm using HomeSeer virtual device "R10" to store the inches data from the sonic sensor and "D12" for the appliance module for controlling power via the wall wart.
And here is the code for the "sonic2.txt" file that is referenced by the hs.OpenComPortex command:
Of course when HomeSeer shuts down the Com7 serial port must be closed. Place this code in your "Shutdown.txt" script:
Doing the Math
Well, I really don't like "inches" and would rather have "percent filled" displayed in another HomeSeer device. In order to do this, some math relationships need to be established.
Notice in the inside water softener picture there is a graduated pipe with measurements starting with "8". I only fill the softener up the the top of the "7" mark, therefore I'm calling this 100% filled. This comes in handy since the way I mounted the sensor that the first reading past six inches was the top of that "7". (Remember this sensor does not start reading at zero, rather it starts at six inches).
I never want my salt level to go below the "top" of the "1" in the graduated pipe so I will call that "zero" percent filled. Now an equation needs to be established with the ultrasonic inches readings and these percent relationship boundaries.
Taking the Data
I first took an ultrasonic reading for the top of the "7" graduated pipe mark by placing a large sheet of cardboard at the top of the "7" mark and, keeping the cardboard level, took a reading with the sensor.
I then took readings at the "6", "5", and "4" marks (since the current salt level was below the "4". At each reading I took the corresponding "inch" reading from the ultrasonic sensor. The results are shown below.

(Click on Picture for Full Sized Image)
Inch Data Measurements at Graduated Pipe Markings
As you can see the data is linear (three inches separates the readings on the graduated pipe's readings). Therefore (as we learned in THIS Guide) we can develop an equation which represents a relationship between the ultrasonic sensor's "inch" reading and "percent" filled.
Since the data is showing a nice linear progression, I just extrapolated the date to the "3", "2", and "1" marks (since the salt was above those numbers, thus prohibiting taking "real" measurements at those levels).
First let’s take a look at the two "extreme" data pairs (for zero and 100 percent filled):
INCHES (X Value)_____PERCENT FILLED (Y Value)
7"__________________100%
24"_________________0%
Now we need to calculate the slope intercept formula using those data sets above. For a very detailed explanation on how to do this please see the Analog to Digital Converter Guide.
The equation Y = mX + b will be used where m represents the "slope" and b represents the "Y-intercept".
Calculate 'm':
m = (Y2 - Y1) / (X2 - X1)
m = (100 - 0) / (7 - 24) = -5.882
Calculate 'b':
Now solve for b using one of the data pairs above (24,0 in this case):
Y = mX + b
0 = -5.882X + b
b = 141
Determine the Equation:
Therefore we have an equation which can convert "inches" from the ultrasonic sensor to "percent filled":
%Filled = -5.882 (inches) + 141
You can test this equation using any data pair listed above and see that it is correct. For additional details on how and why this method was used please refer to the Guide listed above.
Implementing the Final Code
Now we have to place all of the above pieces together with an event that will run a program to incorporate all of the above features.
Using HomeSeer set an event to fire once a day (probably in the evening for the voice announcement to be heard) to implement this code (remember the Com port was already opened via the "startup.txt" script):
For my scenario D12 is the appliance module device, R10 is the ultrasonic "inches" data device, and R11 is the "percent filled" device.
I was having a timing problem where the percent device would not get updated, but the inch device would. I solved this by the hacked fix above of just reading and calculating the percent twice (I know, hack job but I got a little lazy towards the end of this project). Maybe one of you code gurus can figure that problem out for me .
.
When the salt level gets to be more than 22 inches from the sonic sensor (i.e. less filled) you can send an Email so you can remember to fill it.
Putting the Icing on the Cake
I use MainLobby and asked Mario if he could create a flash icon which would visually represent the salt "percentage" filled for my water softener. He made the icon below. Note that the slider uses a value from zero to 100 for it's min and max values. I can associate the "percent" HomeSeer device to this icon, thus having an accurate visualization of how full my water softener is!
Conclusion
This represents one way to measure salt level for your water softener. One disadvantage is it needs a serial line to the water softener from your HA machine.
One of the many advantages is there is nothing touching the salt and no strings or devices that need to be reset/recoiled when filling the softener. I would recomend covering the sensor with a small baggie though when filling the unit so the salt's dust can not enter into the sensor.
by BraveSirRobbin
Introduction
This How-To will describe how to measure the salt level for your water softener. This has been requested by a number of members. Various techniques have been tried in the past, but all had one common methodology. "Something" had to touch the salt. Be it a weight, string, magnet, etc... all of these methods required a mechanical means that touched the top level of the salt to acquire a "level" reading.
The problem with these methods was it made refilling the softener difficult. These strings had to be manually coiled/lifted/etc... to get them out of the way, then rearranged so they could start measuring the "new" level.
Methodology
This method uses an "ultrasonic" sensor so nothing touches the salt. Also, with the mounting method used, the sensor can be pivoted out of the way for easy refilling of salt in the water softener.
First, I would like to thank fellow Cocooner roussell for posting about the Maxbotix Ultrasonic Sensor in THIS thread. This sparked an interest for a lot of applications, thus THIS dedicated thread was created.
Also, this How-To was featured as a Home Toys article for their August 2006 issue.
Ultrasonic Sensor Details
HERE is the link for the Maxbotix Ultrasonic Sensor used.
HERE is a detailed data sheet for this sensor.These MaxSonar-EZ1 offers very short to long-range detection and ranging, in an incredibly small package with ultra low power consumption. The MaxSonar-EZ1 detects objects from 0-inches to 254-inches (6.45-meters) and provides sonar range information from 6-inches out to 254-inches with 1-inch resolution. Objects between 0-inches and 6-inches range as 6-inches. The interface output formats included are pulse width output, analog voltage output, and asynchronous serial digital output.

Bench testing was first performed to determine what code/methodology was needed for a serial interface as well as power and overall system accuracy. I had a leftover five volt wall wart and since the unit required 4.5 to 5.5 volts DC for power I thought it would make for a good power source.
After plugging in the wall-wart (to check the voltage output level before connecting it to the sensor), I noticed that the voltage was slightly above 5.5 volts DC (a common problem with most wall warts that I use in my home). I therefore placed a diode in-line with the positive lead in order to get the voltage down to a level within specs.
All the unit needs for an RS-232 interface is for pin 2 of the serial port to be connected to the "TX" solder ring and pin 5 to the "GND" solder ring. The wall wart would of course be connected to "+5v" and "GND".
HyperTerminal was used to check for communication. As soon as the unit was powered up and HyperTerminal set for 9600, N, 8, 1 serial port settings (no hardware control) the unit sent an "R" followed by a three digit ASCII number which represented inches. The update was very fast and it was accurate to within one inch.
I found that as long as the "RX" line was high (or disconnected in this case), the unit would just "free run" (i.e. keep transmitting the data). I also noticed that CPU level was significantly increased when the unit was connected and free-running.
Since I wanted to place this unit in a very warm garage environment and since I didn't want to have it free run I decided the easiest way to have the unit interfaced with my automation computer was to turn power to the unit on via an appliance module for just a second whenever data was needed (only once a day in this case).
I would just turn the appliance module on, wait a second, get the distance data to a HomeSeer device, then turn the unit off.
I would like to thank Michael (the Great) McSharry for helping me out with the serial code (in THIS HomeSeer thread) to interface this device via HomeSeer. Though this code is HomeSeer specific it should be easily modified for other HA systems.
Mounting the Sensor

(Click on Picture for Full Sized Image)
The Water Softener
The sensor is very small and is very easy to mount. Care must be taken as to not short out any circuitry on the PC board.
I mounted the unit on a leftover "hinge mount" from an X-10 security motion sensor (I dropped the motion sensor... long story). I used a rubber washer between the mount and the sensor's PC board. I drilled a small hole through the arm of the mount and attached the sensor as shown.

(Click on Picture for Full Sized Image)
Ultrasonic Sensor Mounting
I then attached the mount to the water softener. Make sure you know exactly what you are drilling/screwing into as not to damage the water softener itself!

(Click on Picture for Full Sized Image)
Ultrasonic Sensor Mounting

(Click on Picture for Full Sized Image)
Ultrasonic Sensor Mounting (Overhead View)
I had the luxury of AC Power and Cat5e cable available near the water softener (prior planning before the house was built). I just used a pair of Cat5e wires from that cable (for the RS-232 signal and gnd) and plugged an appliance module and the wall wart in the nearby outlet via a home made short AC extension cord (for the unit's power). This homemade extension cord has a built in small amperage fuse, therefore I didn't place any additional inline fuses in the system.
I then routed the five volt power leads and the Cat5e pair through the water softener's "overfill drain" outlet and soldered the diode and leads to the sonic sensor's PC board.
Making the Connections to the HA Computer
I then wired the HA computer's Com7 port to the appropriate patch socket in my wiring closet via a custom DB-9 to Cat-5e interface cable. As long as you keep track of the color pair (brown/brown-white in my case) that you wired the sensor's TX and GND lines to, this cable will work through multiple patches.
I just wired the brown wire (connected to the TX) to pin #2 of a 9-Pin D Female connector and the brown-white wire (connected to GND) to pin #5 of the D Female connector to one end of a (cut) Cat-5e cable and plugged the other end into the nearby RJ-45 socket. After going through multiple patches I then used a cut piece of a Cat5e jumper and placed the RJ-45 connector end into the outlet near my computer and soldered the brown wire to pin #2 of a 9-Pin D connector, and the brown/white wire to pin #5. I then connected the 9-Pin D connector to Com7 of my Edgeport USB to eight port serial expander which is on my HomeSeer PC.
You can also use a RJ-45 to 9-Pin "D" connector (such as THIS one) for this final connection instead.

(Click on Picture for Full Sized Image)
Final Wiring & Mounting
Testing the System
I again opened HyperTerminal up and looked at Com 7 with the appropriate serial parameters listed above.
I then turned the appliance module on and noticed a reading of R018 on HyperTerminal which of course meant the unit was reading 18 inches.
I took a tape measure and measured from the "tip" of the sensor to the salt level and that reading was over 17 inches. Therefore the unit looked like it was working properly. I took a piece of cardboard and tested other "simulated" salt levels. The unit's readings were always within an inch of the real measurements.
Developing the Code
As mentioned earlier Micheal McSharry helped with the bulk of the serial interface code. Basically when HomeSeer starts, I want to open Com 7 (in my case as I'm using an Edgeport 8 serial to USB interface) in the "StartUp.txt" file and close the Com Port when HomeSeer exits.
Then, whenever a reading is needed, a HomeSeer event will be created and the unit will power on for a second and then power off. During that time a sensor reading will be "stuffed" in a HomeSeer device and a "converted percentage" reading stuffed into another HomeSeer device. This second percentage reading will represent the salt level in "%" (i.e. between 0-100 percent filled).
Code Listing
Here is the HomeSeer (ver 1.7x) code I used to open serial port 7 and is placed in the "startup.txt" entry:
Note that I'm using HomeSeer virtual device "R10" to store the inches data from the sonic sensor and "D12" for the appliance module for controlling power via the wall wart.
Code:
'Open Com 7 and have Sonic Sensor "Push" Readings To Device "R10"
e=hs.OpenComPortex(7,"9600,n,8,1",1,"sonic2.txt","sonic", chr(13), 1)
if e<> "" then msgbox "Error opening COM7 (Sonic Sensor): " & e
And here is the code for the "sonic2.txt" file that is referenced by the hs.OpenComPortex command:
Code:
sub sonic(data)
    if left(data,1) = "R" and len(data) = 4 then
        sDigits = mid(data,2)
        if isNumeric(sDigits) then
            hs.setdevicestring "r10", cstr(cint(sDigits))
            hs.setdevicevalue "r10", clng(sDigits)
        end if
    end if
end sub
Of course when HomeSeer shuts down the Com7 serial port must be closed. Place this code in your "Shutdown.txt" script:
Code:
hs.CloseComPort(7)Well, I really don't like "inches" and would rather have "percent filled" displayed in another HomeSeer device. In order to do this, some math relationships need to be established.
Notice in the inside water softener picture there is a graduated pipe with measurements starting with "8". I only fill the softener up the the top of the "7" mark, therefore I'm calling this 100% filled. This comes in handy since the way I mounted the sensor that the first reading past six inches was the top of that "7". (Remember this sensor does not start reading at zero, rather it starts at six inches).
I never want my salt level to go below the "top" of the "1" in the graduated pipe so I will call that "zero" percent filled. Now an equation needs to be established with the ultrasonic inches readings and these percent relationship boundaries.
Taking the Data
I first took an ultrasonic reading for the top of the "7" graduated pipe mark by placing a large sheet of cardboard at the top of the "7" mark and, keeping the cardboard level, took a reading with the sensor.
I then took readings at the "6", "5", and "4" marks (since the current salt level was below the "4". At each reading I took the corresponding "inch" reading from the ultrasonic sensor. The results are shown below.

(Click on Picture for Full Sized Image)
Inch Data Measurements at Graduated Pipe Markings
As you can see the data is linear (three inches separates the readings on the graduated pipe's readings). Therefore (as we learned in THIS Guide) we can develop an equation which represents a relationship between the ultrasonic sensor's "inch" reading and "percent" filled.
Since the data is showing a nice linear progression, I just extrapolated the date to the "3", "2", and "1" marks (since the salt was above those numbers, thus prohibiting taking "real" measurements at those levels).
First let’s take a look at the two "extreme" data pairs (for zero and 100 percent filled):
INCHES (X Value)_____PERCENT FILLED (Y Value)
7"__________________100%
24"_________________0%
Now we need to calculate the slope intercept formula using those data sets above. For a very detailed explanation on how to do this please see the Analog to Digital Converter Guide.
The equation Y = mX + b will be used where m represents the "slope" and b represents the "Y-intercept".
Calculate 'm':
m = (Y2 - Y1) / (X2 - X1)
m = (100 - 0) / (7 - 24) = -5.882
Calculate 'b':
Now solve for b using one of the data pairs above (24,0 in this case):
Y = mX + b
0 = -5.882X + b
b = 141
Determine the Equation:
Therefore we have an equation which can convert "inches" from the ultrasonic sensor to "percent filled":
%Filled = -5.882 (inches) + 141
You can test this equation using any data pair listed above and see that it is correct. For additional details on how and why this method was used please refer to the Guide listed above.
Implementing the Final Code
Now we have to place all of the above pieces together with an event that will run a program to incorporate all of the above features.
Using HomeSeer set an event to fire once a day (probably in the evening for the voice announcement to be heard) to implement this code (remember the Com port was already opened via the "startup.txt" script):
For my scenario D12 is the appliance module device, R10 is the ultrasonic "inches" data device, and R11 is the "percent filled" device.
Code:
sub main()
Dim SaltLevel
Dim SaltPercent
Dim i
hs.ExecX10 "D12", "on", 0, 0 Â 'Power for Sonic Sensor
hs.WaitSecs 1 Â 'Wait One Second
hs.ExecX10 "D12", "off", 0, 0 Â 'Power Off Sonic Sensor
hs.setdevicestring "r11", (141 - (5.882 * (hs.DeviceString ("R10"))))
hs.WaitSecs 10 Â 'Wait Ten Seconds
'Set virtual device r11 to percent from the inch reading of r10
hs.setdevicestring "r11", (141 - (5.882 * (hs.DeviceString ("R10"))))
If hs.DeviceString ("r11") > 22 then  'Send an Email if salt level (inches) to low
hs.sendemail"[i]yourpop3.com","yoursmtp.com[/i]","Water Softner Salt Level Low", "The Water Softener Needs to be Filled!"
hs.speak "The Water Softener Needs Filled"
end if
end subI was having a timing problem where the percent device would not get updated, but the inch device would. I solved this by the hacked fix above of just reading and calculating the percent twice (I know, hack job but I got a little lazy towards the end of this project). Maybe one of you code gurus can figure that problem out for me
.When the salt level gets to be more than 22 inches from the sonic sensor (i.e. less filled) you can send an Email so you can remember to fill it.
Putting the Icing on the Cake
I use MainLobby and asked Mario if he could create a flash icon which would visually represent the salt "percentage" filled for my water softener. He made the icon below. Note that the slider uses a value from zero to 100 for it's min and max values. I can associate the "percent" HomeSeer device to this icon, thus having an accurate visualization of how full my water softener is!

Conclusion
This represents one way to measure salt level for your water softener. One disadvantage is it needs a serial line to the water softener from your HA machine.
One of the many advantages is there is nothing touching the salt and no strings or devices that need to be reset/recoiled when filling the softener. I would recomend covering the sensor with a small baggie though when filling the unit so the salt's dust can not enter into the sensor.
 )!
)!